Save your gaia configuration to a file

Lets talk basic configuration.
Checkpoint Gaia have brought a lot of cool features, which we use on a daily basis.
One of my favorites is the posibillity to perform easy deployment and backup of the configurations.
Checkpoint have over time worked with several different type of ways to perform backup, snapshots and others… (leaving the Management server out of this)

The one i use the most, is backing up the gaia configuration… why you may ask ?
Because it works every time.
True, it does not get all the Checkpoint relevant files on the Security Gateway, but it saves me time when i need to configure and deploy a fresh Checkpoint Security Gateway.
The Gaia cli offers the commands to configure the system.
We will take a look at how we can save the configuration to a file.


(To have Checkpoint save your configuration changes to the system, you need to perform “save config” form clish…  notice that this is not the same as the “save configuration” command mentioned in this article.
Save config = save your changes to the database
Save configuration = save your configuration to a file)


We will be working in two modes.
Clish (left) and Expert (bash – right).

Save your gaia configuration
Expert mode
Save your gaia configuration
Gaia Clish


when you login at your Security Gateway you will be met with one of these two prompts.
This is the clish prompt, and “gw2” is the hostname of my gateway.
gw2>
To get to Expert from cli, type “Expert

This is as the name states, the Expert mode, and gaia cli commands does not work here..
(well you can make them work, but that is out of this scope)

[Expert@gw2:0]#
To get to cli from Expert, type “clish

—————————–
To create a backup of your gaia configuration, you need to be in clish mode.
Perform the commands shown below, and you will create the backupfile “nameyourfile”
gw2>
gw2> save configuration nameyourfile

You may want to see whats inside the file, but remember that clish does not support native linux commands like ls or cat.
To view your backupfile, you need to get into expert mode.
gw2> expert
Enter expert password: (Entering my very secret password here)

ls to see the files in your home directory.
[Expert@gw2:0]# ls
ftw.txt nameyourfile
[Expert@gw2:0]# cat nameyourfile
This will show the Checkpoint Gaia configuration, and you can edit the file if you want to change something. If you want to perform a clean installation of a Security Gateway, you can modify and use this file to configure the settings on the gateway.

Now copy this file to usb or off the Checkpoint box and save it for later use.

For more info see Secure Knowledge article: sk91400

https://www.checkpoint.com/

SSH login delay

You may expirence a ssh login dealy, between entering your username and the password prompt.

ssh delay during login
ssh login delay – Click on image to play

The cause of the delay, is when SSHD service performs reverse DNS lookup to the client’s ip address.

You can disable this feature in /etc/ssh/sshd_config
Start by makeing a backup of the file.
[Expert@gw2:0]# cp -v /etc/ssh/sshd_config /etc/ssh/sshd_config_ORIGINAL

Now edit the file with vim.
[Expert@HostName]# vi /etc/ssh/sshd_config

Search for this line “#UseDNS yes”
Push Insert button and add “UseDNS no” on the line below

The file should now look like this.
#ShowPatchLevel no
#UseDNS yes
UseDNS no
#PidFile /var/run/sshd.pid
MaxStartups 10:30:100

To quit and save your settings do the following.
1. Esc
2. Shift + Q
3. wq! + Enter  (w for write q for quit)

Now you should be out of vim, and can restart the service with the command below.
[Expert@gw2:0]# service sshd restart
Stopping sshd: [ OK ]
Starting sshd: [ OK ]
[Expert@gw2:0]#

Now you whould no longer have SSH login delay. 🙂

For more info see Secure Knowledge article sk106497

Delay between user name and password prompts when log in to the gateway via SSH

https://www.checkpoint.com/

Load configuration backup

One of the things i find particular anoying, is when a gaia config backup does not load correct.

On a R77.x system you can backup the configuraiton with “save configuration filename.txt” but after you have performed a clean install of your gateway to R80.x, the configuration stops at line 41, 75, or somthing else…

I HATE it…         The solution is actually simple…. RTFM. (I did today….)

when you log in to your clean installed system, you can manipulate how the clish handles errors.

————————–

gw2> set clienv (push tab)
config-lock – Set Default Config-lock flag.
debug – Set Debug Level.
echo-cmd – Set echo-cmd flag
on-failure – Set on-failure action
output – Set Output mode.
prompt – Set the command prompt.
rows – Set Screen Rows.
syntax-check – Set syntax-check mode.
gw2> set clienv on-failure continue

————————–

If you want, you can save this setting…  I chose not to, as i bet i will forget this is set, when i one day is performing some task, that i really want to stop if there is an error.

Backing up Gaia system level configuration:  sk102234

https://www.checkpoint.com/

Change your clish to bash – from cli

A while ago i posted “Change clish to bash – and back”  but do you know that you can actually do it from clish ?

When creating new users, you can set their enviroment to bash by default.

——————————– 

gw2> set user USERNAME shell /bin/bash 

gw2>save config

Change your clish


——————————– 
Next time you log in, you will be at bash prompt.

https://www.checkpoint.com/

First Time Wizard – run it from Expert

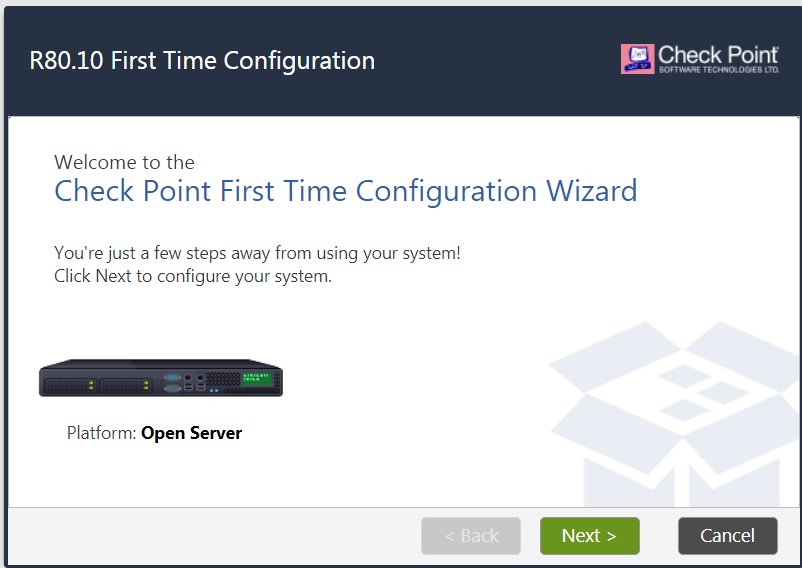
When performing a Clean install of your Gateways, you should try running the First Time Wizard from Expert.

[Expert@gw2:0]# config_system -h
Usage: config_system <options>
where config_system options include:
-f|–config-file <path> Read first time wizard configuration
from <path>.
-s|–config-string <string> Read first time wizard configuration
from string.
-t|–create-template <path> Write first time wizard configuration
template file in <path>.
–dry-run Verify that first time wizard
configuration file is valid.
-l|–list-params List configurable parameters.

If both, configuration file and string, were provided, configuration
string will be ignored.
Configuration string should consist of parameters separated by ‘&’.
Each parameter should include key followed by value e.g. param1=value.
For the list of all configurable parameters and their descriptions,
create configuration template file with config_system -t <path> .
[Expert@gw2:0]#


[Expert@gw2:0]# config_system -t ftw.txt   *(-t to create the template)
[Expert@gw2:0]#
(Edit the config file with vi)
[Expert@gw2:0]# vi ftw.txt
————————————————–  

#########################################################################
# #
# Products configuration #
# #
# For keys below set “true”/”false” after ‘=’ within the quotes #
#########################################################################

# Install Security Gateway.
install_security_gw=true

# Enable DAIP (dynamic ip) gateway.
# Should be “false” if CXL or Security Management enabled
gateway_daip=”false”

# Enable/Disable CXL.
gateway_cluster_member=

# Install Security Management.
install_security_managment=false

# Optional parameters, only one of the parameters below can be “true”.
# If no primary of secondary specified, log server will be installed.
# Requires Security Management to be installed.
install_mgmt_primary=false
install_mgmt_secondary=false

# Provider-1 parameters
# e.g: install_mds_primary=true
# install_mds_secondary=false
# install_mlm=false
# install_mds_interface=eth0
install_mds_primary=false
install_mds_secondary=false
install_mlm=false
install_mds_interface=false

# Automatically download Blade Contracts and other important data (highly recommended)
# It is highly recommended to keep this setting enabled, to ensure smooth operation of Check Point products.
# for more info see sk94508
#
# possible values: “true” / “false”
download_info=”true”

# Improve product experience by sending data to Check Point
# If you enable this setting, the Security Management Server and Security Gateways may upload data that will
# help Check Point provide you with optimal services.
# for more info see sk94509
#
# possible values: “true” / “false”
upload_info=”false”

# In case of Smart1 SmartEvent appliance, choose
# Security Management only, log server will be installed automatically

#########################################################################
# #
# Products Parameters #
# #
# For keys below set value after ‘=’ #
#########################################################################

# Management administrator configuration
# Set to “gaia_admin” if you wish to use the Gaia ‘admin’ account.
# Set to “new_admin” if you wish to configure a new admin account.
# Must be provided, if Security Management installed
mgmt_admin_radio=

# In case you chose to configure a new Management admin account,
# you must fill in the credentials.
# Management administrator name
mgmt_admin_name=

# Management administrator password
mgmt_admin_passwd=

# Management GUI clients
# choose which GUI clients can log into the Security Management
# (e.g. any, 1.2.3.4, 192.168.0.0/24)
#
# Set to “any” if any host allowed to connect to management
# Set to “range” if range of IPs allowed to connect to management
# Set to “network” if IPs from specific network allowed to connect
# to management
# Set to “this” if it’ a single IP
# Must be provided if Security Management installed
mgmt_gui_clients_radio=
#
# In case of “range”, provide the first and last IPs in dotted format
mgmt_gui_clients_first_ip_field=
mgmt_gui_clients_last_ip_field=
#
# In case of “network”, provide IP in dotted format and netmask length
# in range 1-32
mgmt_gui_clients_ip_field=
mgmt_gui_clients_subnet_field=
#
# In case of a single IP
mgmt_gui_clients_hostname=

# Secure Internal Communication key, e.g. “aaaa”
# Must be provided, if primary Security Management not installed
ftw_sic_key=MySecretSicKeyGoesHere

#########################################################################
# #
# Operating System configuration – optional section #
# #
# For keys below set value after ‘=’ #
#########################################################################

# Password (hash) of user admin.
# To get hash of admin password from configured system:
# dbget passwd:admin:passwd
# OR
# grep admin /etc/shadow | cut -d: -f2
#
# IMPORTANT! In order to preserve the literal value of each character
# in hash, enclose hash string within the quotes.
# e.g admin_hash=’put_here_your_hash_string’
#
# Optional parameter
admin_hash=

# Interface name, optional parameter
iface=

# Management interface IP in dotted format (e.g. 1.2.3.4),
# management interface mask length (in range 0-32, e,g 24 ) and
# default gateway.
# Pay attention, that if you run first time configuration remotely
# and you change IP, in order to maintain the connection,
# an old IP address will be retained as a secondary IP address.
# This secondary IP address can be delete later.
# Your session will be disconnected after first time configuration
# process.
# Optional parameter, requires “iface” to be specified
# IPv6 address format: 0000:1111:2222:3333:4444:5555:6666:7777
# ipstat_v4 manually/off
# ipstat_v6 manually/off
ipstat_v4=manually
ipaddr_v4=
masklen_v4=
default_gw_v4=

ipstat_v6=off
ipaddr_v6=
masklen_v6=
default_gw_v6=

# Host Name e.g host123, optional parameter
hostname=

# Domain Name e.g. checkpoint.com, optional parameter
domainname=

# Time Zone in format Area/Region (e.g America/New_York or Etc/GMT-5)
# Pay attention that GMT offset should be in classic UTC notation:
# GMT-5 is 5 hours behind UTC (i.e. west to Greenwich)
# Enclose time zone string within the quotes.
# Optional parameter
timezone=”

# NTP servers
# NTP parameters are optional
ntp_primary=
ntp_primary_version=
ntp_secondary=
ntp_secondary_version=

# DNS – IP address of primary, secondary, tertiary DNS servers
# DNS parameters are optional.
primary=
secondary=
tertiary=

# Proxy Settings – Address and port of Proxy server
# Proxy Settings are optional
proxy_address=
proxy_port=

###################################################################
# #
# Post installation parameters #
# #
# For keys below set “true”/”false” after ‘=’ within the quotes #
#########################################################################
# Optional parameter, if not specified the default is false
reboot_if_required=

———————————————- 


When you have customized the config file, you can run it from Expert mode.


[Expert@gw2:0]# config_system -f ftw.txt
dos2unix: converting file ftw.txt to UNIX format …

Validating configuration file: Done
Configuring OS parameters: Done
Configuring products: Done
Verifying installation…

First time configuration was completed!

Reboot is required in order to complete the installation, please perform it manually

Going to load initial security policy.
Your remote session will be disconnected now.
Login again to continue working on the gateway.


For more info see Secure Knowledge article: sk69701


First Time Wizard – run it again or skip it.

If you have been deploying Checkpoint Firewalls, at some point you most likely have wanted to skip the First Time Wizard.
(First Time Wizard)

First Time Wizard

When migrating gateways to new hardware, I often save the Gaia configuration, and import it just after installing the new appliance. This saves me the trouble of configurering everything from scratch.

(Take note, that this is not possible in all scenarios)

Gaia Save Configuration command.
———————
mgmt1> save
clienv – Save CLI environment variables.
config – save current configuration
configuration – Save configuration to file
mgmt1> save configuration mysavedconfigurationfile
———————

In most cases i skip the FTW, and import the saved Gaia config…

To skip the Gaia FTW in R80 and above, create the “accepted” files manual.

Login in Expert mode, and create these files.

  • [Expert@HostName:0]# touch /etc/.wizard_accepted
  • [Expert@HostName:0]# touch /etc/.wizard_started

For full description see sk71000


If you want to rerun the FTW, simply delete the files above.

  • rm -i /etc/.wizard_accepted
  • rm -i /etc/.wizard_started

See also…

http://svendsen.me/first-time-wizard-run-it-from-expert/

https://www.checkpoint.com/

Change clish to bash – and back.

If you want to use winscp to transfer files, to and from Checkpoint, you might have run into this error.

winscp

This happens because winscp needs bash (or simular) in order to log on.
You can however change this, with the following command.
Notice that you will jump directly to Expert mode (which is bash) when loggin on.

Go to Expert mode
———————————————————–
CP1> expert
Enter expert password: ***********

Warning! All configuration should be done through clish
You are in expert mode now.

Expert@CP1> chsh -s /bin/bash admin
———————————————————–

Exit the cli console, and try to log on again.
Remember, that your normal admin user, now will enter Expert mode the moment you log on.

———————————————————–
login as: admin
This system is for authorized use only.
admin@192.168.11.1’s password:
Last login: Sat Aug 22 21:53:00 2015 from 192.168.11.109
[Expert@CP1:0]#
———————————————————–

Now try to connect with winscp, using your admin (now expert mode) credentials.

winscp 2

—————————————————————————————————————————-

Q:   OK I GOT THIS !  BUT HOW DO I CHANGE IT BACK TO GAIA CLISH ?

Good question !

The command is almost the same, only the directory of shell is different.

———————————————————–

[Expert@CP1:0]# chsh -s /etc/cli.sh admin
Changing shell for admin.
Shell changed.
[Expert@CP1:0]#exit
logout

(Try to login again)

login as: admin
This system is for authorized use only.
admin@192.168.11.1’s password:
Last login: Sat Aug 22 21:53:23 2015 from 192.168.11.109
CP1>
———————————————————–

And now the shell is back to Gaia Clish.


You might also be interested in  Change your clish to bash – from cli